Friday, October 14, 2011

Boo Buckets!

So it's been FOREVER since I posted to this blog! But it's time once again for our annual "Boo-ing" so I thought I'd share with you what we're doing in this year's "Boo Buckets"! And because it's

Featured On The  Crafty Nest
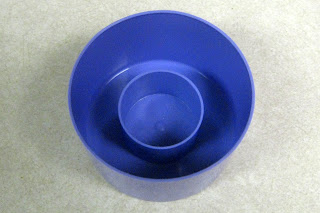
I figured I'd share them with you here! This year we went with "buckets" instead of the traditional bags because it was cheaper mainly. The buckets were only $1.50 at the grocery store and are super cute! Inside this year's bucket's the traditional "boo" sign and instructions and some store-bought goodies like glow sticks, a halloween coloring book, a couple of halloween pencils, a halloween "slinkie", a miniature can of play-dough that we put a halloween label on (calling it Goblin Goo) and a bottle of bubbles with a special label (calling them Bubbly Brew). I also included a mini-loaf of homemade pumpkin butter bread and a jar of "cowboy cookie mix" calling them "Monster Cookies". I think it turned out pretty cute! And just because I'm such a nice person (haha) I'm going to share the recipe for both the cookies and the pumpkin butter bread with you! The cute sign and instructions for this year's bucket came from
create avatar
Check it out if you want a copy for your boo-ing!


We've done 4 buckets...kiddos get to deliver them soon!
Close up of one of the buckets
Here you can see the cookie mix and bread


And just as I promised, here are the two recipes for the cookie mix and the pumpkin butter bread...

For the "Monster Cookies", you can do quart sized jars (as the ones in our buckets are) OR you can do pint-sized jars (just divide the recipe in half or make two pint jars). 
Mix ingredients for 1 quart or 2 pint jars:

1 1/3 cup all purpose flour
1 teaspoon baking powder
1 teaspoon baking soda
1/4 teaspoon salt
1 1/3 cup cooking oats
1/2 cup Reese's pieces
1/2 cup semi-sweet chocolate chips
1/2 cup brown sugar, packed
1/2 cup white sugar

Combine the flour, baking powder, baking soda and salt in a small bowl. Pour into jar(s) and tamp down well. (I used the bottom of my baking soda bottle and a shot glass for "tamping"). Layer the remaining ingredients in the order shown tamping down each layer as hard as you can in order for it all to fit. We topped the jars with a square of orange fabric (cut with pinking shears) and tied it with a brown ribbon. Then, apply a "Monster Cookies" label to the front and the following instructions to the back of the jar:

Monster Cookie Mix in a Jar
 
1. Preheat oven to 350 degrees F Grease cookie sheets.
2. In a medium bowl, mix together 1/2 cup melted butter, 1 egg, &  1 tsp vanilla. Stir in the entire contents of the jar. Shape into walnut sized balls. Place 2 inches apart on prepared cookie sheets.
3. Bake for 11 to 13 minutes in the preheated oven. Transfer from cookie sheets to cool on wire racks.

Note: if making this into TWO pint sized jars, alter direction label to use 1/4 cup butter, 1 egg and 1/2 tsp vanilla...

The pumpkin butter bread starts with homemade pumpkin butter... I use the recipe from  Oh She Glows but do it in the crockpot on low for 2-4 hours instead. Works great! Once you have your pumpkin butter, the rest is easy!

Better than the Best Pumpkin Butter Bread

1/2 cup unsalted butter, softened
3/4 cup packed brown sugar
3/4 cup granulated sugar
2 eggs
1 1/2 cup pumpkin butter
2 tsp baking soda
1 tsp salt
2 tbsp wheat germ
2 cups all-purpose flour
1/2 cup chopped walnuts (or dried cranberries)

Preheat oven to 350F. Grease tw0 regular loaf pans or 5 mini-loaf pans. Cream the butter and sugars together until combined. Add eggs, one at a time, beating to combine. Add pumpkin butter and beat to combine. In a medium bowl, combine flour, wheat germ, baking soda and salt. Slowly incorporate into wet mixture, beating til just combined. Stir in walnuts (or cranberries). Spoon into prepared pans. Bake in preheated oven until a toothpick inserted in the center of the loaf comes out clean. For regular loaves, about 1 hr. For mini-loaves, about 40 minutes, checking after 30.

Enjoy!

Sunday, June 26, 2011

Here's the photo card I made for Mike for Father's Day from the girls...

We Love Daddy Father's Day 5x7 folded card
Shutterfly offers exclusive graduation announcements and invitations.
View the entire collection of cards.

Wednesday, January 26, 2011

Fun but messy Valentine's Day project for your Tot


So today my 2.5 year old and I have been having fun in the kitchen with a messy, sticky art 
project for Valentine's Day and I decided to share it with you! This is a great project for kids that like to get messy (ie. mud pies, play dough, etc....things that "squish") and is a great project for using up small scraps of yarn or ribbon. You could use this same project for Easter or for Christmas by changing the colors of yarn and the shape of the cookie cutters! For this project, you'll need:
  • 1 jar (only part of it actually) of Mod Podge or a bottle of plain white school glue
  • A bowl or plate you don't mind getting "gluey" (we used a paper plate with a rim)
  • A cookie sheet covered with aluminum foil or waxed paper (parchment would also work)
  • Cookie cutters in choice of shapes (we used hearts for Valentine's Day
  • Various scraps of yarn or ribbon in 1-2' lengths or shorter
  • If making into a card, you'll need card making supplies like cardstock, stickers, etc
  • If making into an "ornament", you'll need a length of ribbon or yarn for hanging your "ornament"
To start with, place your cookie cutters on your foil/paper covered sheet pan. Now, pour a puddle of your adhesive onto your plate/bowl. If using school glue you may want to water it down a bit since it will be thicker. Now comes the fun but messy part... Let your tot put the pieces of yarn/ribbon into the puddle and squish it all around! Make sure the yarn gets thoroughly coated in the adhesive mixture. Now, take the strands and run them through your fingers to remove any excess adhesive and then swirl into the inside of the cookie cutters on the cookie sheet. This is "artistic placement" so feel free to swirl and swizzle to your heart's (no pun intended!) content! Once you're satisfied with the number of strands in the cookie cutter, press down lightly to make sure the strands stick together and then lift the cookie cutter and move to another spot to continue making your shapes.  Allow to dry for several hours or overnight until thoroughly dried and stiffened. You can now make them into any number of things. Use them to decorate packages, as decorations on cards, as ornaments...the uses are endless! We're going to use them on the front of the Valentine's Day cards we send to her grand/great-grandparents! I'll post a picture of the finished cards when I complete them...


Saturday, December 18, 2010

Pinecone Bird Feeders with a Toddler


Pine Cone Bird Feeders with a Toddler


So this fall my in-laws gave me a bag full of extra-large pine cones they had collected, knowing I would come up with something crafty to do with them. And so what better project to use them for than as a handmade Christmas gift, made by my 2 year old daughter, her daddy and I, that we can give back to them (and to her other grandparents). I had her daddy take pictures as we made them so we can also share the photos of her making them with her grandparents. 

Now, this is a MESSY project, so to start with I recommend you either do this project outside where you don't care if there's a mess, or do like we did and put a tarp or large blanket down that you can get messy on and then take outside to shake out. I have a "picnic blanket" kind of thing that we put down because it was too cold outside to do this outdoors. You'll also need some sort of large open pan (a roaster, disposable or otherwise, works well) or box to put the birdseed in. We used the box from a flat of bottled water for ours. And you'll need a large bowl, large spoon, disposable gloves (if you don't want messy hands), a large jar of peanut butter, a bag of regular yellow cornmeal, some kitchen twine (or other strong string) and a bag of birdseed. You want birdseed that's mostly small pieces, not all sunflower seeds, etc. because it won't stick as well.

First step is to put down the tarp. Then, cut some lengths of twine and tie them to the fat end of the pinecone. Hubby did this for me. Leave them untied at the end so they can then be tied to a tree limb.  Meanwhile, mix peanut butter and cornmeal in a large bowl until the consistency of cookie dough. You'll want it a little sticky so the bird seed will stick but not so creamy that it just smears onto the cone. 

Mixing the "dough"

Once you have this mixed up, pour your bird seed into whatever container you're going to use for rolling and you're ready to go. Because my toddler is only 2, and doesn't particularly like having messy hands (doesn't like mud, etc. on them), I handled the "dough" part, but if your toddler likes squishing things, let him/her do the "squishing". Just take a handful of the peanut butter "dough" and squish it in between the tines of the pinecone. Make sure to pack it in pretty tightly and then round it with your hands.

"smooshing" it into the pinecone
Once the pinecone is covered with the "dough", place it into your pan/box of bird seed. Now, roll it all around, coating it in bird seed.
Covering with bird seed
Make sure to pat the bird seed in well so that it doesn't just fall off. You want it to adhere very well to the "dough".
Patting it in
Fun with bird seed
After they're all covered, lay aside to dry on a sheet pan or drying rack. This will help them "set". Then just bag them up and they're ready to go.  We put ours in "non-zip-top" plastic storage bags and then twist-tied them closed. Give them as gifts or use them yourself in your own yard (we don't have any trees, thus no birds, so are giving them as gifts). Tell the recipient to just tied the cone outside to a tree branch where they'll be able to see the birds come and feast. The peanut butter and cornmeal are good foods for the winter as of course is the bird seed and even the pine cone is a tree as some birds enjoy the seeds found deep inside the cone. The best part is, this project is 100% biodegradable so no need to clean up or throw away any part of it. Enjoy this fun project and have fun getting a little messy!

Final product


NightOwlCrafting


Wednesday, December 8, 2010

Merry KissMas Tree!


NightOwlCrafting


It's time for this week's Hoo's Got Talent on Night Owl Crafting! This week I'm showing you the gift that I make for my husband and his co-workers almost every year...a KissMas Tree! It's a super easy craft that is a big hit with his friends at work. This year I used dark chocolate kisses, but you can use whatever kind you want. 

For this craft, you'll need one craft cone (you know, the floral kind), two bags of Hershey's kisses, a box of toothpicks and some scissors that are capable of cutting the toothipicks (so don't use your good fabric scissors!) One other thing you might want to use although it's optional, is a lid from some sort of spray can, like spray starch. This will be used as a base for the tree and makes sure it sits straight once the kisses are all in place.


Some of the supplies you'll need. Not pictured: Floral foam cone

Optional plastic cap, this one from a can of spray starch!
To start, you'll want to cut a bunch of toothpicks in half so you have at least 40-50 halves. You'll probably need more (I didn't count!) but that will get you started... Once you've cut the toothpicks in half, insert each half, pointed end first, into the bottom (flat part) of the kiss. If you want to do an all green tree with only a few colored kisses as ornaments, you'll probably need more than two bags of kisses...that's why I decided to go the "striped" route with this tree...less green ones needed!


Cut toothpicks in half and insert pointed end into bottom of kiss
After you've gotten quite a few kisses prepared, you're ready to start putting them into the tree. Choose what color you want your topper to be and stick your first kiss in the top of the tree. Then, working concentrically, wind your way down the cone, adding kisses as you go. Once all the kisses are in the tree, you can put the can lid into the base if using and you're ready to go! To give as a gift, just take some cellophane and wrap it from bottom to top, tying at the top with a pretty bow.  Make sure you warn anyone who wants to rob your tree that there are toothpicks in the kisses! Occasionally the end will break off in the kiss so they'll want to keep from biting into a hunk of wood!

Without the cap base

With cap base

Merry KissMas!

Wednesday, November 24, 2010

Hoo's Got Talent: Salt Dough Cornucopia


NightOwlCrafting


This year I decided to try making a cornucopia for use as a centerpiece for Thanksgiving. I've seen them done with bread dough before but wanted something a little more "lasting" (i.e. can be reused year after year) so decided to try it with salt dough instead. Here's my recipe for salt dough which I used for this experiment...

Salt dough for crafting

2 cups water
2 cups salt
6 cups flour (I used "white wheat" because it was stale in the pantry and needed to be pitched...)
2 tbsp vegetable oil
1 egg

In the bowl of a large stand mixer (i.e. Kitchenaid) mix flour and salt together. Add oil and then slowly add water. Start this process with a regular mixing blade but switch to a dough hook when it starts taxing the mixer. Allow to mix until combined then remove to the counter where you need to knead it for another 5-10 minutes or until pliable. It is now ready to use for all kinds of crafting projects...

For the cornucopia project, you'll need a disposable pizza pan (3 to a pack at W-Mart), a cookie sheet, some spray oil (Pam) and a spray bottle with water in it. Form the pizza pan into a cone shape and slightly bend the narrow end to form a slight arc then spray liberally with Pam. Also spray your cookie sheet with Pam. Now, roll out your dough into 1/4" thickness or so, then slice into 1.5" thick strips. Starting at the narrow end, wrap the dough strips around the cone, spritzing with water as you go to act as "glue". Make sure you overlap your strips by 1/2" or so as you wrap and just start a new strip each time you end one, making sure to adhere the new strip well. Once you've wrapped to the end of the cone (or as big as you'd like your cornucopia to be), spritz the whole thing with water and lightly press together to make sure it's all well stuck. Now, take a ball of your dough and divide into three lumps. Roll each into a long snake piece, at least as long as your cornucopia opening is around, then braid the three pieces together. Flatten the braid slightly. Now spray the opening of your cornucopia with water and adhere the braid to the opening edge. Place your completed cornucopia on the cookie sheet and place in a 350F. oven for 30 min. Meanwhile, whisk your egg with about 1 tbsp water to make an egg wash. After 30 minutes are up, brush your cornucopia well with the egg wash and allow to bake another 15 minutes. Brush again and allow to go 15 minutes more. Now, turn the oven as low as it will go (170F for my oven). Carefully remove the pizza pan from your cornucopia opening and allow to continue baking at the lower temperature for 2-3 hours or until completely hard and dried out. At this point let your creation cool and use or you can spray it with spray varnish to preserve for future use.


This dough can also be used for making ornaments, faux fruit, pumpkins, etc. for your decor, etc. It can be painted once baked with tempera paints as well.  I'll share the finished product tomorrow after we add the "dressing" for the centerpiece...


Thursday, November 18, 2010

Holiday Hats

I decided to join the "Hoo's Got Talent" round-up over at Night Owl Crafting this week and thought I'd share some of my recent projects...


NightOwlCrafting


I've been keeping myself occupied recently with my new 3 month old and her 2 year old sister, but in my spare time (HA!) I've been loom knitting some cute hats for her and her older sister... Thought I'd share them with you and pass along the links to my sweet friend Brenda's blog where she shared the patterns with us in our loom class...

Here's the first one is a "pumpkin" head hat made following Brenda's pattern that you can find here.


As modeled by 2 year old Emma

And a smaller version modeled by then-2 month old Hannah
 The second hat is a Turkey Hat, again from Brenda's blog


Emma LOVES hats :)
The last one I did is a snowman hat following the directions Brenda posted here, but I'll have to share photos of that one later since I've not gotten them taken yet! Hope you enjoy these few and will check out Brenda's patterns on her blog! Be sure and check back with me next week for a new "Hoo's Got Talent" post!

Wednesday, June 10, 2009

F page completed

Ok, I've completed the F page for my art journal and while I'm not completely happy with it, I guess it turned out "ok". I was out of town (in Corpus for our church annual conference) last week and so am trying to catch up before we head out of town again to go to Ohio next week. I'm going to try and get my S page done tomorrow :)

Process description:
Fawn colored background - watercolored floral scraps from flower catalog - center is a "wordle" collage of various F words as shown below
Wordle: F words
- letter F negative stenciled with ivory paint - Entire surface stippled with walnut ink - dry brushed over all with forest green and french rose paint colors mixed with glaze medium - F stencil outlined with black sharpie then entire surface sanded for distressed finish.

Here's the finished results. Click the thumbnail for a closer shot. Enjoy!
F page after

Monday, June 1, 2009

N pages complete

Well, I've completed my first layout for the ADW (see next post) and thought I'd share it as well as my process. Started with two page spread which was gesso-ed white. Right side had window cut into it which I turned into a door opening. Painted light blue craft paint over entire area and let dry. Mixed medium blue paint with glaze medium (half & half) and then spread over light blue. Wiped most of this off leaving a heavier concentration around the outer edges and let dry. Then mixed dark blue paint with glaze medium (1/3 paint, 2/3 glaze) and again wiped off most. Took gold Brilliance ink and stamped random stars over background. Using a waded up paper towel, "swiped" some gold on as comet trails then rubbed a bit around the window opening on right page. Next, stamped the word "NIGHT" in white Brilliance ink followed by random fonts of the letter N all over background. Again "swiped" a bit of white ink as comet trails. Used white paint on fingertip to create white "background" for wording of poem, Lord Byron's #600 (She walks in beauty...). Using a black sharpie, lettered the poem, then inked around window opening and "stitched" around "NIGHT" stamping. Finally, I created a gel medium transfer of a vintage woman. I cut out a "door" of cardboard which will be adhered to reverse of right page and painted it with gold craft paint, then adhered the transfer to this "door". Enjoy!

New Adventure - Alphabet Discovery Art Journal

alphabet discovery workshop logo

Ok, so I'm trying to break out of my creativity rut and have enrolled myself in Trish Bee's Alphabet Discovery Workshop. Our goal is to create an art journal using the alphabet as inspiration. First letter chosen was the letter N. I wanted to capture "before" photos of my book so you could see the results as I post them and compare. So below are photos of the "Before" pages, gesso-ed and ready to go. I decided to use a book I purchased for altering quite some time ago called "The Doll House Book". Bought it damaged from the used book store for another project and never "got around to it" so am using it here. The book is "house" shaped and the front opens like two barn doors. It should make an interesting altered book. Anyway, here are the photos of the before work (click on them to be taken to the photos with descriptions):

Monday, July 28, 2008

Friday Fill-ins


1. I believe whatever doesn't kill you mustn't be all that bad!.

2. If you're good at something, improve.

3. Why so many rude cell phone users?.

4. Something is out there, it's just a matter of finding it.

5. If my life were a sitcom, it would be titled Waiting for What?.

6. Sitting on my back porch [if you don't have one, use your imagination] I see sunflowers growing over my Astroturf lawn.

7. And as for the weekend, tonight I’m looking forward to getting more unpacking done, tomorrow my plans include knitting and watching hubby paint and Sunday, I want to sleep!

Friday, June 20, 2008

1. A smile is contagious.
2.Trivial Pursuit is my favorite board or card game.
3. I would love to have more time in my life and less stress.
4. When I think of the Summer Solstice, I think of sunshine.
5. I just remembered I need to get a haircut!
6. One of my favorite song lyrics goes like this: I hope you'll dance.
7. And as for the weekend, tonight I’m looking forward to having time with my hubby, tomorrow my plans include going to the Habitat re-store for house stuff and Sunday, I want to get the nursery painted!

Sunday, May 25, 2008


1. On my laziest day I like to sit in the sun and read or knit!
2. Checking things off my to-do lists makes me feel like I'm being productive.
3. I love little babies and big hugs!
4. This summer I want to get the nursery completed!
5. Narcissism (LOL!) made me start my blog. No, really, probably my love to write...
6. Red roses and orange sunsets.
7. And as for the weekend, tonight I'm looking forward to spending time with hubby, tomorrow my plans include working on the house and Sunday, I want to go to church and spend time working on my digital photos!

Wednesday, February 27, 2008

What's your temperament?

Don't know if this really describes me or not :)


You Have a Choleric Temperament


You are a person of great enthusiasm - easily excited by many things.

Unsatisfied by the ordinary, you are reaching for an epic, extraordinary life.

You want the best. The best life. The best love. The best reputation.


You posses a sharp and keen intellect. Your mind is your primary weapon.

Strong willed, nothing can keep you down. Your energy can break down any wall.

You're an instantly passionate person - and this passion gives you an intoxicating power over others.


At your worst, you are a narcissist. Full of yourself and even proud of your faults.

Stubborn and opinionated, you know what you think is right. End of discussion.

A bit of a misanthrope, you often see others as weak, ignorant, and inferior.

My Celebrity Look-alikes...

Tuesday, December 11, 2007

Ok, so I've been so busy lately with both creative and non creative things that I've not had time to post the pictures I said I would a while back! So I'm sharing some here and hope you'll enjoy them.

First up is something I made for myself, a felted guitar strap! I just love the SWS yarns and so when I saw a pattern for a needle knitted strap on the Lion Brand site, I thought, hey! I could do that on a loom with no trouble at all and this SWS would be terrific for it! So I kinda made up my own pattern as I went along. I used my pink long KK loom, working with the figure 8 wrap and started with about 12 rows of straight knit stitch (stockinette) in a dark purple SWS (called Natural Raisin). I then went into a sort-of-garter stitch, still following the figure 8 path, and switched to a variegated "Natural Violet" SWS. I did that for 2 skeins and then went back to the stockinette stitch with the Natural Raisin to finish it off. I machine felted it and because it wasn't as "felted" as I wanted, I also machine dried it :) The result is a very thick strong strap that will be perfect for my guitar...not that I've had time to put it on and test it out yet! Anyway, here's a few pics of that project:


Next up, a "soft" hooded sweater I made for my niece Kayla's second birthday. I say "soft" because that's what she calls it, a "soft". I basically used the pattern by Janet Brown called Child's Hooded Sweater, but made adjustments for size difference since it was originally a pattern for 4-5T (and resized for 12-18 months as well) and Kayla is a 2T right now. I used Lion Brand's Homespun yarn in Baroque, a nice purple color that Kayla loves and I really like how it turned out. I especially like the pocket Janet came up with which reminds me of a cross between a slash pocket and a "muff". The best part is that with this yarn, the pocket virtually disappears from sight on the sweater so it's not super obvious that it's there. Anyway, here are some photos of that project. Kayla curled up with it right after she opened it at her birthday party. This first photo is a size guide so you get a reference.


Next is a picture of the pocket that I just love! This pic with the flash on shows how the pocket blends into the sweater so it's hard to see.


This one WITHOUT the flash shows the pocket a bit better...


This is one of the sleeves. I love the way the knit/purl pattern makes it almost lacy and wavy.

And these last three are just overall shots of the finished sweater. Proud of it, can't you tell! :)


Ok, SPOILER ALERT!!! IF YOU ARE A FAMILY MEMBER, STOP RIGHT HERE!!! CHRISTMAS GIFT INFO FOLLOWS!!! DON'T YOU PEEK!!!

If you are a family member and are still reading this post at this point, don't blame me if Santa takes back your gift! :)

Ok, the next thing on the photo tour is the scarf and hat set I made for my mother-in-law for Christmas. In my previous post I talked about the yarns I used, but here are the final results. The hat actually took two tries, so I'll post the "bad" hat after I post the "good" one :) The scarf was just a straight stockinette stitch on the KK pink long loom, using the double sided (figure 8) stitch pattern. I added fringe to the ends which I knotted to keep from fraying. The hat is loosely based on the "Keep Warm" hat in Denise Layman's "Learn to Knit on Circle Looms". Both were done with the Lion Brand Organic Cotton in Bark and the Bernat Natural Blends Bamboo in Linen, using 2 strands throughout. I really like the feel of these two yarns together. They came out incredibly soft and warm. The bamboo "frizzes" (for lack of a better term) a bit when washed, but it's still very soft and warm.

The first photo is of the "standing" finished hat.


Next is the "bad" hat... It's not really "bad", but ended up too loosely woven for a northern winter hat. So I'm keeping it for me :) The original pattern, from Anne Bipes "Learn New Stitches on Circle Looms", is for a "Woven Top Hat" and the yarn she uses in the pattern is Lion Brand Thick & Quick, which is considerably thicker than the four strands (two of each yarn) that I used for the woven part. But I like the way it turned out, even if not for a colder climate.


Last but not least is a shawl I made for my stepmom for Christmas from the Lacy Shawl pattern posted at Loomknitting.com I used YarnBee's Featherwisp yarn in Creamcicle. I have to say that this is the SOFTEST acrylic yarn I've ever worked with AND it's a pain in the neck to keep untangled! It's so soft and slippery that the ball doesn't stay intact and once it starts to slip, it tangles horribly. But it's still beautiful and soft :) I love this pattern and the frame it creates around the edges so I'm hoping Mom will like it as well.


So, that's all the "done" projects... I still have a prayer shawl on the prayer shawl loom and have been making Knifty Knitter Christmas bells as ornament gifts (will post photos later of those). And I finally got the straw loom, so am looking forward to playing with it a bit later. Meanwhile though, hope you enjoy the pics!