Saturday, December 18, 2010

Pinecone Bird Feeders with a Toddler


Pine Cone Bird Feeders with a Toddler


So this fall my in-laws gave me a bag full of extra-large pine cones they had collected, knowing I would come up with something crafty to do with them. And so what better project to use them for than as a handmade Christmas gift, made by my 2 year old daughter, her daddy and I, that we can give back to them (and to her other grandparents). I had her daddy take pictures as we made them so we can also share the photos of her making them with her grandparents. 

Now, this is a MESSY project, so to start with I recommend you either do this project outside where you don't care if there's a mess, or do like we did and put a tarp or large blanket down that you can get messy on and then take outside to shake out. I have a "picnic blanket" kind of thing that we put down because it was too cold outside to do this outdoors. You'll also need some sort of large open pan (a roaster, disposable or otherwise, works well) or box to put the birdseed in. We used the box from a flat of bottled water for ours. And you'll need a large bowl, large spoon, disposable gloves (if you don't want messy hands), a large jar of peanut butter, a bag of regular yellow cornmeal, some kitchen twine (or other strong string) and a bag of birdseed. You want birdseed that's mostly small pieces, not all sunflower seeds, etc. because it won't stick as well.

First step is to put down the tarp. Then, cut some lengths of twine and tie them to the fat end of the pinecone. Hubby did this for me. Leave them untied at the end so they can then be tied to a tree limb.  Meanwhile, mix peanut butter and cornmeal in a large bowl until the consistency of cookie dough. You'll want it a little sticky so the bird seed will stick but not so creamy that it just smears onto the cone. 
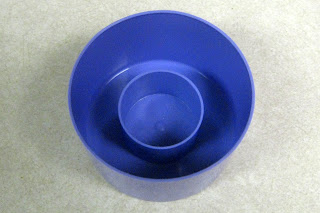
Mixing the "dough"

Once you have this mixed up, pour your bird seed into whatever container you're going to use for rolling and you're ready to go. Because my toddler is only 2, and doesn't particularly like having messy hands (doesn't like mud, etc. on them), I handled the "dough" part, but if your toddler likes squishing things, let him/her do the "squishing". Just take a handful of the peanut butter "dough" and squish it in between the tines of the pinecone. Make sure to pack it in pretty tightly and then round it with your hands.

"smooshing" it into the pinecone
Once the pinecone is covered with the "dough", place it into your pan/box of bird seed. Now, roll it all around, coating it in bird seed.
Covering with bird seed
Make sure to pat the bird seed in well so that it doesn't just fall off. You want it to adhere very well to the "dough".
Patting it in
Fun with bird seed
After they're all covered, lay aside to dry on a sheet pan or drying rack. This will help them "set". Then just bag them up and they're ready to go.  We put ours in "non-zip-top" plastic storage bags and then twist-tied them closed. Give them as gifts or use them yourself in your own yard (we don't have any trees, thus no birds, so are giving them as gifts). Tell the recipient to just tied the cone outside to a tree branch where they'll be able to see the birds come and feast. The peanut butter and cornmeal are good foods for the winter as of course is the bird seed and even the pine cone is a tree as some birds enjoy the seeds found deep inside the cone. The best part is, this project is 100% biodegradable so no need to clean up or throw away any part of it. Enjoy this fun project and have fun getting a little messy!

Final product


NightOwlCrafting


Wednesday, December 8, 2010

Merry KissMas Tree!


NightOwlCrafting


It's time for this week's Hoo's Got Talent on Night Owl Crafting! This week I'm showing you the gift that I make for my husband and his co-workers almost every year...a KissMas Tree! It's a super easy craft that is a big hit with his friends at work. This year I used dark chocolate kisses, but you can use whatever kind you want. 

For this craft, you'll need one craft cone (you know, the floral kind), two bags of Hershey's kisses, a box of toothpicks and some scissors that are capable of cutting the toothipicks (so don't use your good fabric scissors!) One other thing you might want to use although it's optional, is a lid from some sort of spray can, like spray starch. This will be used as a base for the tree and makes sure it sits straight once the kisses are all in place.


Some of the supplies you'll need. Not pictured: Floral foam cone

Optional plastic cap, this one from a can of spray starch!
To start, you'll want to cut a bunch of toothpicks in half so you have at least 40-50 halves. You'll probably need more (I didn't count!) but that will get you started... Once you've cut the toothpicks in half, insert each half, pointed end first, into the bottom (flat part) of the kiss. If you want to do an all green tree with only a few colored kisses as ornaments, you'll probably need more than two bags of kisses...that's why I decided to go the "striped" route with this tree...less green ones needed!


Cut toothpicks in half and insert pointed end into bottom of kiss
After you've gotten quite a few kisses prepared, you're ready to start putting them into the tree. Choose what color you want your topper to be and stick your first kiss in the top of the tree. Then, working concentrically, wind your way down the cone, adding kisses as you go. Once all the kisses are in the tree, you can put the can lid into the base if using and you're ready to go! To give as a gift, just take some cellophane and wrap it from bottom to top, tying at the top with a pretty bow.  Make sure you warn anyone who wants to rob your tree that there are toothpicks in the kisses! Occasionally the end will break off in the kiss so they'll want to keep from biting into a hunk of wood!

Without the cap base

With cap base

Merry KissMas!

Wednesday, November 24, 2010

Hoo's Got Talent: Salt Dough Cornucopia


NightOwlCrafting


This year I decided to try making a cornucopia for use as a centerpiece for Thanksgiving. I've seen them done with bread dough before but wanted something a little more "lasting" (i.e. can be reused year after year) so decided to try it with salt dough instead. Here's my recipe for salt dough which I used for this experiment...

Salt dough for crafting

2 cups water
2 cups salt
6 cups flour (I used "white wheat" because it was stale in the pantry and needed to be pitched...)
2 tbsp vegetable oil
1 egg

In the bowl of a large stand mixer (i.e. Kitchenaid) mix flour and salt together. Add oil and then slowly add water. Start this process with a regular mixing blade but switch to a dough hook when it starts taxing the mixer. Allow to mix until combined then remove to the counter where you need to knead it for another 5-10 minutes or until pliable. It is now ready to use for all kinds of crafting projects...

For the cornucopia project, you'll need a disposable pizza pan (3 to a pack at W-Mart), a cookie sheet, some spray oil (Pam) and a spray bottle with water in it. Form the pizza pan into a cone shape and slightly bend the narrow end to form a slight arc then spray liberally with Pam. Also spray your cookie sheet with Pam. Now, roll out your dough into 1/4" thickness or so, then slice into 1.5" thick strips. Starting at the narrow end, wrap the dough strips around the cone, spritzing with water as you go to act as "glue". Make sure you overlap your strips by 1/2" or so as you wrap and just start a new strip each time you end one, making sure to adhere the new strip well. Once you've wrapped to the end of the cone (or as big as you'd like your cornucopia to be), spritz the whole thing with water and lightly press together to make sure it's all well stuck. Now, take a ball of your dough and divide into three lumps. Roll each into a long snake piece, at least as long as your cornucopia opening is around, then braid the three pieces together. Flatten the braid slightly. Now spray the opening of your cornucopia with water and adhere the braid to the opening edge. Place your completed cornucopia on the cookie sheet and place in a 350F. oven for 30 min. Meanwhile, whisk your egg with about 1 tbsp water to make an egg wash. After 30 minutes are up, brush your cornucopia well with the egg wash and allow to bake another 15 minutes. Brush again and allow to go 15 minutes more. Now, turn the oven as low as it will go (170F for my oven). Carefully remove the pizza pan from your cornucopia opening and allow to continue baking at the lower temperature for 2-3 hours or until completely hard and dried out. At this point let your creation cool and use or you can spray it with spray varnish to preserve for future use.


This dough can also be used for making ornaments, faux fruit, pumpkins, etc. for your decor, etc. It can be painted once baked with tempera paints as well.  I'll share the finished product tomorrow after we add the "dressing" for the centerpiece...


Thursday, November 18, 2010

Holiday Hats

I decided to join the "Hoo's Got Talent" round-up over at Night Owl Crafting this week and thought I'd share some of my recent projects...


NightOwlCrafting


I've been keeping myself occupied recently with my new 3 month old and her 2 year old sister, but in my spare time (HA!) I've been loom knitting some cute hats for her and her older sister... Thought I'd share them with you and pass along the links to my sweet friend Brenda's blog where she shared the patterns with us in our loom class...

Here's the first one is a "pumpkin" head hat made following Brenda's pattern that you can find here.


As modeled by 2 year old Emma

And a smaller version modeled by then-2 month old Hannah
 The second hat is a Turkey Hat, again from Brenda's blog


Emma LOVES hats :)
The last one I did is a snowman hat following the directions Brenda posted here, but I'll have to share photos of that one later since I've not gotten them taken yet! Hope you enjoy these few and will check out Brenda's patterns on her blog! Be sure and check back with me next week for a new "Hoo's Got Talent" post!